1/02 The big pile of sheet metal that I have been stripping is... GONE! Amazing!!
What a great feeling.
I though this day would never come. All of the paint
is now off the inner fenders, hood sides, lower grille panels, dash cover, header panel, rear window frame, and
other assorted pieces. They are ready for primer. Well, almost. I still have to sandblast a few odd
corners I couldn't reach. And I still have to do a little (big understatement here) welding and patching.
I like to do the welding and hammering before primer. Coating the metal with Picklex 20 keeps
it from rusting so there isn't a big rush to get it into primer. Besides, the garage is 28 degrees
inside, which is somewhat less than the ideal (or minimum) temperature for painting.
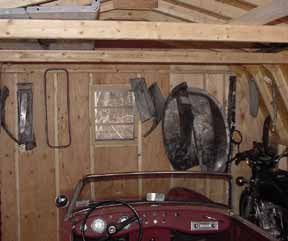
Next question. What to do with this pile of stripped sheet metal? I had already moved some of the
larger pieces out to the Austin Healey garage. Then I got the bright idea of putting nails in the walls
and hanging up all the small stuff. Perfect solution! (In the picture you can see the running boards
up in the rafters.) I hope nothing falls on the Healey.
I picked up the fuel tank. I was surprised to see a large square patch on the top.
Dick said it was standard procedure to cut a hole in the top to be able to get inside to clean it
out. I guess he neglected to tell me that when I dropped the tank off. He said it was really loaded
with varnish and crud. No surprise there. He repaired the neck, pressure tested the tank, and coated it.
The coating was fresh and still emitting toxic fumes. I drove the Explorer that day and had to roll
all of the windows down. Despite all the nice, 20 degree fresh air, I think I still caught a buzz.
2/02 February was designated as welding month. I did some fix up welding plus welded in patches
on the inner fenders, the lower grill panels, and the header panel above the windshield. I am starting
to get pretty good at making little sheet metal patches. I usually clamp a piece of sheet metal behind
the hole and transfer the outline with magic marker. If the panel is curved, I trace the
outline to part of a heavy manila file folder, cut out the pattern, and transfer it to sheet metal.
I trim it close to size with an air nibbler and trim to fit on the grinding wheel.
I started straightening out the grille. It looks like it took a couple of hits. My problem
was getting something in between the louvers to get the metal straight. Much thanks to
Gordon Littleton for the tip on putting a 1/2-inch diameter steel rod inside the louvers. Banging
on the rod helps to straighten them, plus it allows the louvers to keep their shape while moving
them and straightening their sides. The '38 grille is two separate sides joined together (unlike the 39 grille,
which is one piece). The first few
bangs on the grille caused the small metal piece holding the halves together to crack in half. It was too
small to clamp for welding, so I put a tie down strap (the kind with the fabric strap and racheting tightening
mechanism) around the grille to hold everything in alignment and welded the joining piece back together. I
also made a patch for the lower part that is rusted away, but did not get a chance to put it in.
The grille is starting to look pretty good.
Among other odd jobs, I disassembled the front bumper and bracket assembly. The bumper is shot, but the
brackets are now ready for blasting. I disassembled both sets of spare tire
carriers. It looks like the one from the '39 is in better shape and will take less work to rehabilitate
(once again, pits are better than holes).
3/02 and 4/02 Time to tackle the bedsides... It's really not that
I'm too cheap to spring for the $700
plus shipping repro bed sides. Nope. I really want to use the original tin. The first task was patching
all of the badly
rusted areas. Or at least the worst of the badly rusted areas. I cut out the bad parts using a cut off wheel
in a die grinder and a sabre saw with a metal blade. This converted the bedsides into Swiss cheese.
It took a while to patch all of the holes. I used 18 patches on one side and 11 patches on the other side.
It's a good thing I have now become an expert at cutting and fitting little metal patches.
I used a hammer and dolly to bring the sheet metal to somewhere near where it is supposed to be. I had to
do some heat shrinking in a few places. Next I replaced the stake pockets and the center support.
I punched holes (not drilled -- it needs to be flat as possible) about where the originals were spot welded, about
2 inches apart. Then I plug welded the pockets to the bedsides. The stake pockets really increased
the rigidity of the bedsides; no more flopping around. It went well except for one minor detail.
SHOP TIP: Check to see where holes in the
stake pockets are not required before punching (like where the rear cross member is located). This will
save having to weld up holes that aren't supposed to be there in the first place. After that was done, I shot
a coat of primer on most of the bedsides. I ran out of primer and had to drive to Car Color to get another gallon.
I had them shake it for me so that it would be well mixed. I got back and popped the lid off. Oops. I
got DPLF90 (black) instead of DPLF50 (gray). Oh well, its all the same stuff, right? I could always use the
leftover primer on the Toyota and drive a cool looking black primer truck. Ha.

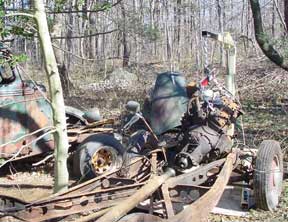
When I fantasize about actually completing this project someday before I die, I try to figure out some sort of schedule, keeping in mind that it is too cold to do paint and bodywork in my garage at least 6 months of the year. I decided that next winter I could work on the chassis. That means getting the frame down to the bare frame and sand blasting it. So, it was off the the woods to visit my chassis. With the help of my wife, a chain, and a comealong, I moved the '38 chassis somewhat close to the '39 with the idea of pulling the engine and transmission out of the '38 as one unit and putting it in the '39. I removed the right front fender from the '39 because I needed the front brace and the inside of the headlight. It also makes it less hassle to put the engine in. I assembled the El Cheapo engine crane I bought at the EL Cheapo tool sale at the American Legion last fall. That went together well. Then I began to assemble the EL Cheapo engine leveler. Oops, missing critical parts. They must have forgotten to put them in the box, and they got left behind in China. I wrote it off, ran out to Pep Boys, and picked up a leveler. After unbolting everything (the greasier the bolt, the easier it is to remove), I attached the engine to the crane and lifted it out. I dropped it on a furniture dolly and pushed it over to the '39 where I picked it up and dropped it in. Mission accomplished.
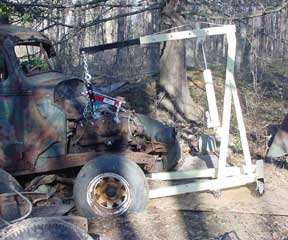
While unbolting the engine, I had to make numerous trips from the woods to the garage for tools and stuff.
I decided that it would be much easier to get the chassis down to the bare frame in the garage. The snow coming down
while I was unbolting the torque tube had nothing to do with this decision. Well, maybe a little. Now that
the threat of having to scrape frost off the windshield is past, it is time to move my wife's
Jeep out of the garage for the summer. Then I will
move the chassis in and get it down to the bare frame.
5/02 May was frame month. The Jeep went out of the garage, and the chassis went in.
First I removed the
torque tube from the differential. That was fun. Someone welded in the pins that held on the coupler. I
guess that stopped them from falling out??? It sure worked. It took a lot of grinding, banging, and cussin'
to get it apart. Next I removed the brake system. Then off came attachments like exhaust hangers, fuel line
clips, brake cable clips, etc. Next I removed the transmission cross-member. It was held on by 8 rivets,
which had to be drilled out. I broke about 200 drill bits. I also removed the two plates that attach the
front cross-member to the frame. Drilled out more rivets. Broke another 200 drill bits. Next I removed the
front end all in one piece, and
then finally the rear end in one piece. I was down to the bare frame! I checked the frame to make sure
that it was square (not diamoned) and level. It was. I breathed a big sigh of relief!
I figured that with my little sand blaster, it would take 2-3 days to get the frame down to bare metal,
allowing the compressor time to cool between tanks of sand.
I got some quotes on getting it blasted, and it sounded like it was worthwhile to farm the job out. I could
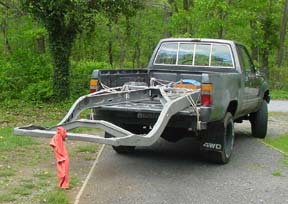
spend the 2 or 3 days doing other things. I tossed the frame in the back
of the Toyota and took it to the sand blaster. They said turnaround time would be about a week. I said I
was hoping it could be done sooner. They called 3-1/2 hours later and said it was done, so I went over and
picked it up. It cost $123. A bargain!
I moved the frame back in the garage and inspected it. The blasting opened up some rust through that
wasn't there before. Blasting has a habit of doing that sort of thing. There is rust through on the outer rails
near where the back of the x-member joins the frame on both sides.
There also is an area or two that is badly pitted. That is about the extent of frame damage.
I will cut out the bad metal and weld in new metal. Fixing the frame on the Toyota has given me plenty of
practice doing that. I wiped down the frame with Picklex 20 to
keep it from rusting until I get it repaired and painted. I ordered some Zero Rust paint and picked up some 1/8-inch
steel plate, and I am ready for the next step.

6/02
Most of June was taken up by a trip out West. We spent 24 days on the road seeing
the scenic and natural wonders of South Dakota, Wyoming, Utah, Arizona, and Colorado. We also
briefly visited Montana, Idaho, and New Mexico.
7/02 I think I spent much of July recovering from June's trip. 7,000+ miles in 24 days! And I did all
the driving!
I did finished one of the bedsides to the primer stage and got started on the other one. It won't
win the best in show award, but considering what a piece of Swiss cheese it was when I started,
it didn't turn out too bad. I also started looking for a rear end and an engine. The proper width
rear end is narrrow, 58 or 58-1/2 inches measured outside of drum to outside of drum. I have a list of
suitable donors: 77-81 Granada, 77-81 Lincoln Versailles, 66-77 Bronco. I visited three U-pull-it
yards and two they-pull-it yards. No Luck. The U-pull-it-yards claim they don't know what is in the yard.
"Pay the entrance fee, son, and go have a look around." The they-pull-it yards tell me, "We haven't
seen one of those in years."
8/02 - 9/02 The summer came and went and, as usual, I did not get as much
work done on the truck as I had
planned. I did have lots of fun at the beach with the family! I managed to
accomplish a couple of things. One was to finish
the body work on the second bed side. The second was to spray most of the sheet metal with three coats of high
build primer (PPG K-38). Before sraying the K-38, I scuffed everything and shot a coat of epoxy primer.
I also tried spray filler on one running board and one bed side where the metal was quite pitted. It did a fairly
good job of filling the pits, and it was very easy to sand. It has a short pot life, and when it solidified in
the spray gun, I was really glad I was using an El Cheapo knockoff I bought at the Macungie Hot Rod show.
It was not fun cleaning that stuff out of the gun. I am not sure I even got all of it out!
I made a couple of more junkyard trips looking for a rear axle. No luck. I did find an '85 Toyota pickup with only
91,000 miles, so I grabbed the carb since I need one. I also went shopping for an engine -- a 4.6 liter motor from a
1999-2002 Mustang GT. I found a low mileage motor at a reasonable price and also found out what a transponder key was.
The Mustang -- and most late model cars -- use a key with a radio transmitter. The computer checks the frequency of
the transmitter using a pickup coil in the ignition switch. If the computer does not recognize the key, the
engine will not run. To make it run, I need the correct key, the ignition switch with pickup coil, column
wiring harness, dash wiring harness, theft light, PAT module, and possibly one other module in addition to the
engine and the engine computer. I guess I would have know about this if my newest car was newer than a '91.
I would like to use this motor. A stock 260 HP motor makes a good starting point.
I am trying to find an easy workaround.
10/02 - 11/02 It is early December. Snow is on the ground. It hasn't gotten
above freezing much lately,
and the temperature in the garage is below 40. Fortunately I managed to get a few things done before this
cold snap.
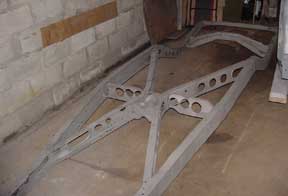
I repaired and painted the frame (pictures to right and bottom left). I cut out the places
where the frame was rusted through. I made patches from 10 gage steel and welded them in.
Them I gave the frame two coats of Zero Rust paint. The first coat was red oxide, and the second
coat was black. That way I could see the areas where the second coat was spotty or thin, and I
could make sure that complete coverage was achieved on the second coat.
I dismantled the windshield. My goal was to get it apart without breaking the glass. I
half suceeded. First, I removed the hinges. Between the screws that were broken off and the
ones I broke off, I will have some drilling out to do at a later time. The glass was sealed in with some
kind of goop that had to be scraped away. While I was in scraping mode, I scraped out as much
of the deteriorated rubber windshield gasket as I could, which fortunately, was most of it. Next
the upper and lower halves of the frame had to be separated. That's when I cracked the glass. I
was planning on new glass anyway. Yep, I was. The center
piece that holds the glass was rusted to the point of being useless. I picked up a replacement piece
in decent shape from Ebay. For once I did not get sniped in the last 7 seconds.
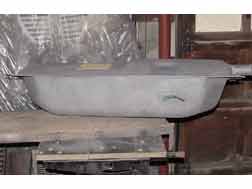
I sandlasted the gas tank (before and after pictures below). I also sandblasted the gas tank,
windshield frame, front and rear bumper brackets, headlight buckets, spare tire carrier, fender braces,
and other miscellaneous parts.
I decided that it was much more pleasant sandblasting when it was 47 degrees and cloudy than
when it is 90 degrees and sunny. Not that sandblasting is or could ever be considered "pleasant."
The tyvek suit, hood, and respirator were much more comfortable at the lower temperature.
In what was the final painting of the season, I gave the gas tank two coats of Zero Rust (pictures
below). I also
shot some epoxy primer on the windshield frame, and all of the other parts I sandblasted plus
the grille, which I had not yet painted.
I am still looking for a rear end.... I haven't found one yet. But I did find a '36 Ford pickup in
fairly decent shape, so I bought it. I just couldn't resist... my next project.


12/02 I finally decided to fill the big, ugly hole in the dash where the clock was as well
as the other holes I won't be using. I cut some patches from sheet metal and welded them in.
I finished it off with a skim coat of filler. With the kerosene heater, I warmed the garage
and cab up enough to do some filler work, but not enough to shoot some primer. I also worked
some more on the grille.
While I was on a roll doing unpleasant jobs, I decided to drill out the broken easy out lodged
in the upper left door hinge bolt in the cab. It is located in a place that is impossible to get to
from behind or the side.
I got out the special cobalt drill bits I had purchased and saved for this occasion
and drilled and drilled and
drilled. Nothing. OK. I know that I am drilling hardened steel, but these cobalt bits are supposed
to go right through this stuff. Time for the big guns. I broke out the titanium drill bits. I drilled and
drilled and drilled. Nothing again. No bolt was going to beat me. Out of sheer frustration I broke out the
torch and heated that
broken bolt and easy out untill it glowed red hot. I wasn't sure what I intended to accomplish other
than to toast the sucker for not cooperating. I suppose I un-hardened the easy out because it drilled
like a hot knife through butter after it had cooled. I still need to drill the hole to the proper size
and tap it. It is probably off center, but I had enough unpleasant tasks for the day so I
decided to put it off.

1/03 - 2/03 It sure is a long, cold, snowy winter. There has been snow in
my yard continuously since before
Thanksgiving. That is most unusual for these here parts. The garage seems to be a steady 28 degrees. I managed
to sand the 2K (high build) primer (PPG K38) on many of the larger sheet metal parts. Yep, I sanded them -- right
through to the bondo, epoxy primer, or metal underneath in many places. I thought the sheet metal was fairly
smooth with a little nick here and there that had to be taken care of. Surprise! I found hundreds of low spots
and flaws that needed some additional filler and sanding. It is hard to believe that I put at least 8 hours
of work into each fender. And I have to reshoot the K38 when it is warm enough and sand again. I have done
enough wood working and interior house paint to know that the final paint magnifies every little flaw. Stuff
you never saw glares at you. So now is the time to do it right and get it as nice as I possible can. Nobody is
going to ask me if Boyd built it, but I do want it to be somewhat decent looking.

Someone at work asked me how the truck was coming. I told them I was sanding the 2K. They asked what 2K was.
I explained that it was very expensive primer that I worked very hard at turning into a pile of dust on the
garage floor.
The kerosene torpedo heater heats up the garage nicely
in a few hours, but I wanted to make sure the sheet metal was at least 60 degrees before I put additional filler
on it. So I splurged on a Rayteck Infared Non-Contact Thermometer with optional laser sighting from
Autobodyshop.com. This is a really nifty instrument
every tool junkie should own. Point and click and it gives you the surface temperature. Now I know if/when the
metal is warm enough.